Install Kubectl
https://kubernetes.io/docs/tasks/tools/install-kubectl-linux/
Install and Set Up kubectl on Windows
Install Helm
Install aws
https://docs.aws.amazon.com/cli/latest/userguide/getting-started-install.html
ensure that aws version is 2
aws --version
aws-cli/2.4.5 Python/3.8.8 Linux/5.4.0-94-generic exe/x86_64.ubuntu.20 prompt/off
If the version is incorrect you may need to change your alternative to set the correct version
Set credentials
Go to AWS login
https://youtapsso.awsapps.com/start#/
https://d-9767097d99.awsapps.com/start# - Vodafone/OneNZ
https://d-97677ec3f8.awsapps.com/start#- Development
login with your domain password (firstname.lastname no email)
Go to Command line or programmatic access
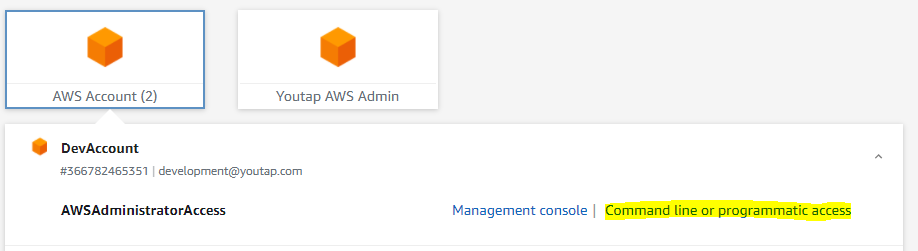
Follow the instructions in Option 2 to add credentials
Set AWS configuration
create or edit .aws/config file and add the following
[default]
output = table
region = us-east-1

[profile youtap-sandbox]
sso_start_url = https://youtapsso.awsapps.com/start#/
sso_region = ap-southeast-2
sso_account_id = 933721922566
sso_role_name = AWSAdministratorAccess
region = ap-southeast-2
output = json

[profile youtap-dev]
sso_start_url = https://youtapsso.awsapps.com/start#/
sso_region = ap-southeast-2
sso_account_id = 366782465351
sso_role_name = AWSAdministratorAccess
region = ap-southeast-2
output = json
Set kube configuration
Create or edit .kube/config and add the following
apiVersion: v1
preferences: {}
kind: Config
clusters:
- cluster:
    certificate-authority-data: LS0tLS1CRUdJTiBDRVJUSUZJQ0FURS0tLS0tCk1JSUM1ekNDQWMrZ0F3SUJBZ0lCQURBTkJna3Foa2lHOXcwQkFRc0ZBREFWTVJNd0VRWURWUVFERXdwcmRXSmwKY201bGRHVnpNQjRYRFRJeE1URXlOekU0TlRjek4xb1hEVE14TVRFeU5URTROVGN6TjFvd0ZURVRNQkVHQTFVRQpBeE1LYTNWaVpYSnVaWFJsY3pDQ0FTSXdEUVlKS29aSWh2Y05BUUVCQlFBRGdnRVBBRENDQVFvQ2dnRUJBTUlmCitMYmJuaVZ3ZFpsM2E3RXFYUWU2V09xNVB5UjZZcTJycGNEY1JOdlRWWUVLNFJGd0JVaDZxeWFiWEl1ZjMrQnUKZHlIM3ZsZElEbVlEVFJqL1Qyd2U1MEtNaWdoT1RBL1FJQjhYOEZabWNmL3k1WTJ3VitrZTRHSXUySzNLUGZXTQpUVWlzVjVyZEo1RXR1Y2VBUm9ELzZ6RWNuQXFjRmRIVG1PM1lSRGNPbXlzYUJudFhuRi9qWjJFN3BYQWxEay9MClMxaVQ3dTNBREJuZFFkVkpZSm5qNjA4T2srL0l1VHppVzNTdTRZVk5hYUpKZ0J5MFRvV2VpaS9NYkNCcnFKU2UKTXhMbjZoL3BTclp2WUJGdEtmbXVBTWlzdW1PRkpoV1dOUDdrVkpWODBsY0dFRlQzQzBmUFVXUTdRb0ZFdXhRSQo3ci9hOHB0TXh4ZFFQcmVHdXNNQ0F3RUFBYU5DTUVBd0RnWURWUjBQQVFIL0JBUURBZ0trTUE4R0ExVWRFd0VCCi93UUZNQU1CQWY4d0hRWURWUjBPQkJZRUZJdk5Kc255a3dxK0UxR2pMZzlJN1pCSlBGbmVNQTBHQ1NxR1NJYjMKRFFFQkN3VUFBNElCQVFDbkhvRVhBazBQaHhQSmZUUHpIeGJROWRmQjk5WHZnYzUwbCs3Nnlud0Nmc1djOHlNawpROWlGT2kzY1k3S3BIU29aZDhXSDRRbVhPdHIzWkRKanpNQXZzQWRqL2wvTldPV2wyYXg0OHB1Y2R2OUc3Y0gwCmYrTVZQamc1WWNBOTRGYi9kWjFNc20wMHhtdXhZbGxvWGwyU1cwMU1wZE12WnVPdUJZWmtybmkyUFpBOGlicGMKSDJCMjF4UFpob3psMjB6RlVUTnNUeCtRa0Y4Y3U0VW53NFR1d1RFNkNMdWUyejV4VzJQeEs5YXhTRC8xUDVBTAoyS2RzVmxGaUc5SnVGY3M5YVZUSkdEWCtzcU1LZUk4RHAwZlltQ1NxSTdZazI5bVdlQ0NTZ1N3ZWFoeVRWUFZ1CmdEckE1K3ZTcFcxeFVOUHI2T01Dak1FNjVDQjFmOGxQYXk2cgotLS0tLUVORCBDRVJUSUZJQ0FURS0tLS0tCg==
    server: https://F077246D87BF31657AAD4EAE7D824E7F.gr7.ap-southeast-2.eks.amazonaws.com
  name: arn:aws:eks:ap-southeast-2:933721922566:cluster/sandbox-eks
- cluster:
    certificate-authority-data: LS0tLS1CRUdJTiBDRVJUSUZJQ0FURS0tLS0tCk1JSUM1ekNDQWMrZ0F3SUJBZ0lCQURBTkJna3Foa2lHOXcwQkFRc0ZBREFWTVJNd0VRWURWUVFERXdwcmRXSmwKY201bGRHVnpNQjRYRFRJeE1URXlPVEF5TlRJeU4xb1hEVE14TVRFeU56QXlOVEl5TjFvd0ZURVRNQkVHQTFVRQpBeE1LYTNWaVpYSnVaWFJsY3pDQ0FTSXdEUVlKS29aSWh2Y05BUUVCQlFBRGdnRVBBRENDQVFvQ2dnRUJBTUw0CmZPS2xsV2JEOWVXN2kwSTNDOElSMXNxUUZhaGw4RTRjQUxoK3ZIVjJuN3NHNW1ObEgvUDd6K2ZKZ0M0Ri9TaW0Ka2dWV2d2OGRPQVl4NDEvc09jRzVUZ1A3TnJRYkE5czJkaG1WTXF2MWo2MjJiSXpheUoxZ1Fsa1hEUzU0amNEMAp6eDNrcGhxZkd2UmNjdzVkRGJidUJ3V3BodnAwbVpGcXltRkRzVDAyMUZ4eVFLV3dxUnRlWk1KMVR3WncyV2p6CjJVVVFOYSs2VHozenZ6N2ZGK2ttNlErNlBVdDc2eE9TSHBrdDZ6NlV5aFhFN2cyV2dTT0gzSWJUcTdHTTdkWVEKV1NLOFNjR29ybVN2dnI4Zms2N0M5TjRselNRem00anRyZmNEdXowMVQrTEthTzFFTGwvVFhZUzRHeU1haGJhdQoyZWszWUt1NHowV3lMZFl3Y3FVQ0F3RUFBYU5DTUVBd0RnWURWUjBQQVFIL0JBUURBZ0trTUE4R0ExVWRFd0VCCi93UUZNQU1CQWY4d0hRWURWUjBPQkJZRUZPeThmMGYxRFhvMUVFRWdGaGJLbThTMllvRStNQTBHQ1NxR1NJYjMKRFFFQkN3VUFBNElCQVFDZGRWSHY1RlRUU0RTWDZybllhVWxuNW1qMTk5VVBCeExJY2dBOFdyRlRnTWtpcVo1bQpqQ3ZuSDh3Y1lsZ25RT2M4MTdNVXBGL0traU53UFZIWlMwOVNrblNIVU9lQnR6Y0lCNzB1bHcrbUwzVzg4UlBEClBLc1JpaFZpSEwwTnJXalovTll2WHNkZFBIcE9HWmFGM1BxemZsaXVTenI0cmU1RzNCYU1rYUdxc3d3dmNQVjkKSmZOc2UrWWlsNEZ0UUloRytleXdjRHZFaEhqaCt6NE9vNENZaFZnbVVmSzF2bFUwb3YvbGJZSWFpT1QwNTNNeApFeE1KNk5WdnU5SHNFV0J1VEh0WDRLYm5RR0huZHpmbHM3d0NEdnFBKy93WmVYVXRBeDY2Q1BRY3VGZ1J2b296Ckd5Mmk0SXRwK1JaQ2JtR1dtdkpKVlVTeFoxOENEanAyNXNqZgotLS0tLUVORCBDRVJUSUZJQ0FURS0tLS0tCg==
    server: https://D97DA2F4FB55252C814C3B18D8948D35.gr7.ap-southeast-2.eks.amazonaws.com
  name: arn:aws:eks:ap-southeast-2:366782465351:cluster/dev-eks
contexts:
- context:
    cluster: arn:aws:eks:ap-southeast-2:933721922566:cluster/sandbox-eks
    user: arn:aws:eks:ap-southeast-2:933721922566:cluster/sandbox-eks
  name: arn:aws:eks:ap-southeast-2:933721922566:cluster/sandbox-eks
- context:
    cluster: arn:aws:eks:ap-southeast-2:366782465351:cluster/dev-eks
    user: arn:aws:eks:ap-southeast-2:366782465351:cluster/dev-eks
  name: arn:aws:eks:ap-southeast-2:366782465351:cluster/dev-eks
current-context: arn:aws:eks:ap-southeast-2:366782465351:cluster/dev-eks
#current-context: arn:aws:eks:ap-southeast-2:933721922566:cluster/sandbox-eks
users:
- name: arn:aws:eks:ap-southeast-2:933721922566:cluster/sandbox-eks
  user:
    exec:
      apiVersion: client.authentication.k8s.io/v1alpha1
      args:
      - --region
      - ap-southeast-2
      - eks
      - get-token
      - --cluster-name
      - sandbox-eks
      command: aws
      env:
      - name: AWS_PROFILE
        value: youtap-sandbox
- name: arn:aws:eks:ap-southeast-2:366782465351:cluster/dev-eks
  user:
    exec:
      apiVersion: client.authentication.k8s.io/v1alpha1
      args:
      - --region
      - ap-southeast-2
      - eks
      - get-token
      - --cluster-name
      - dev-eks
      command: aws
      env:
      - name: AWS_PROFILE
        value: youtap-dev
Login to AWS to confirm
Login to dev profile
aws sso login --profile youtap-dev
You will be prompted for AWS sso login
then approve code request
Then run
kubectl get pods -A
This should provide a list of running pods
NAMESPACE               NAME                                                READY   STATUS             RESTARTS   AGE
api-gateway             deployment-api-gateway-7f849fc495-hxwg6             1/1     Running            0          37m
audit-rest-api          deployment-audit-rest-api-6bbdcdd7dd-k6pvs          1/1     Running            0          37m
auth-server             deployment-auth-server-748c964875-652rr             1/1     Running            0          37m
....
Note: troubleshoot see comment:
Install pgAdmin and Setup Database
-
Follow this Instruction to install pgAdmin to CentOs. Install pgAdmin
Or, to install on windows: https://www.pgadmin.org/download/pgadmin-4-windows/
-
Install Pritunl Client on CentOS 7:a. Export Pritunl user Profile:
-
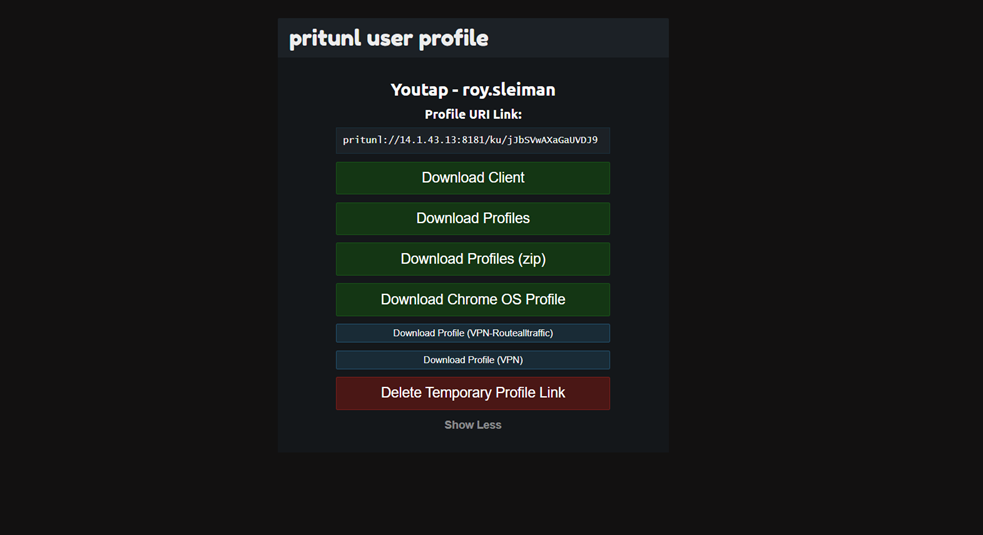
Access the following link: https://14.1.43.13:8181/
-
Type the username and password
-
Copy the profile URI Link
b. Add Pritunl Profile:
-
Run the following command: pritunl-client add <URI Link copied>
c. Start Pritunl Profile:
-
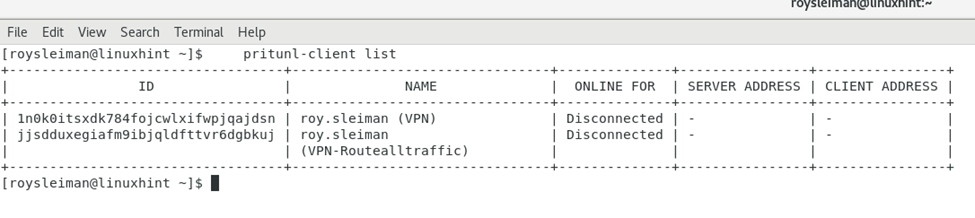
First run the following command: pritunl-client list to get the ID of the profile, then start the profile.
-
-
Start Profile Command: pritunl-client start <First 3 digits of ID> --mode=ovpn –-password=<Password>.

-
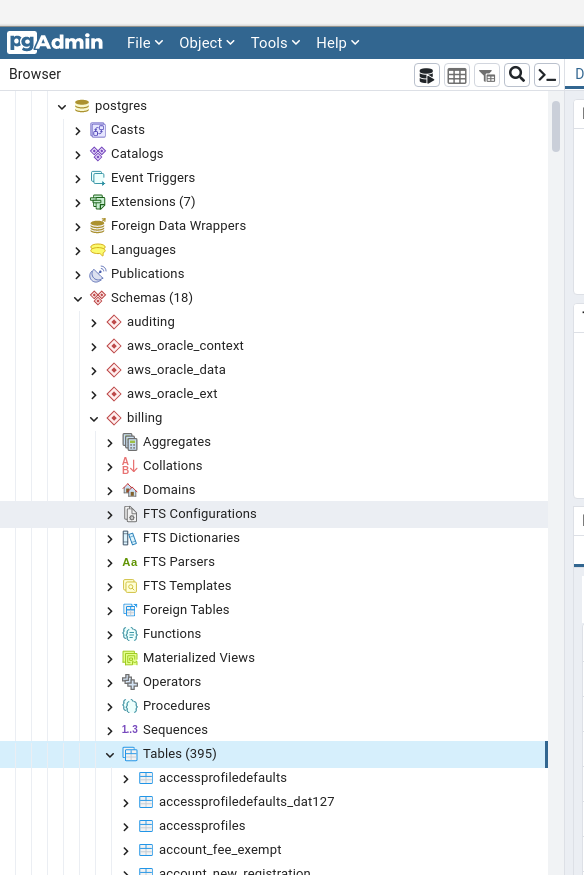
3. Open pgAdmin and Add Server.
→ Add following details.
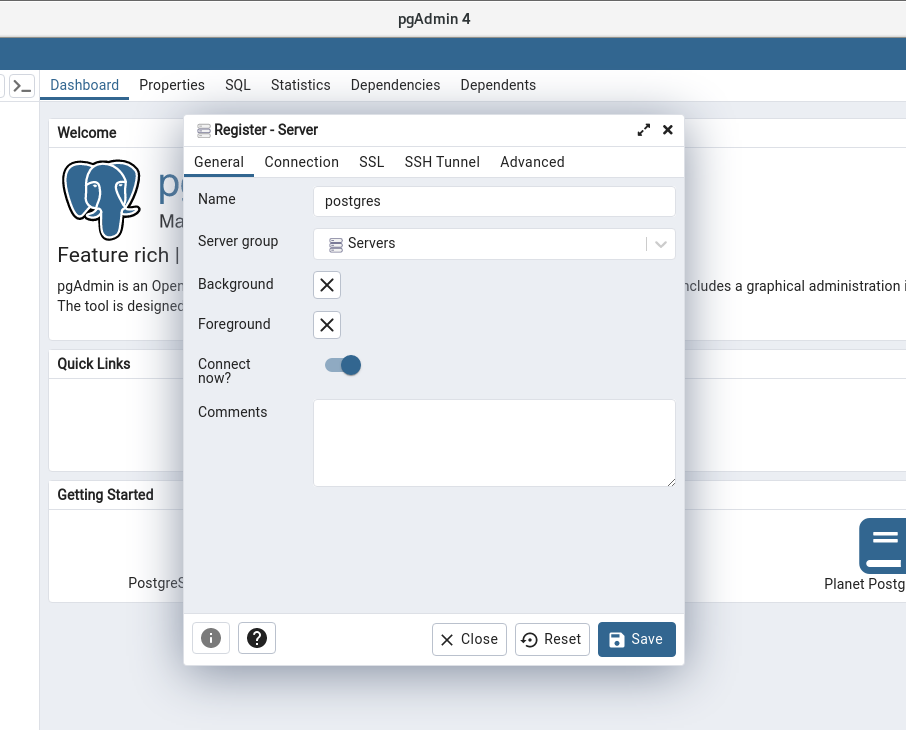
4. Add Connection details.
Hostname: clean-image.cxfcnmjgnzsu.ap-southeast-2.rds.amazonaws.com
Port: 5432
MaintenanceDatabase: postgres
Username: postgres
Password: postgres

We can find Tables postgres > Schemas > Billing > Tables