
Customers receive notifications for a range of events. This article describes how to customise a notification that is sent out by
AMS
and
CMS.
-
On the
AMS
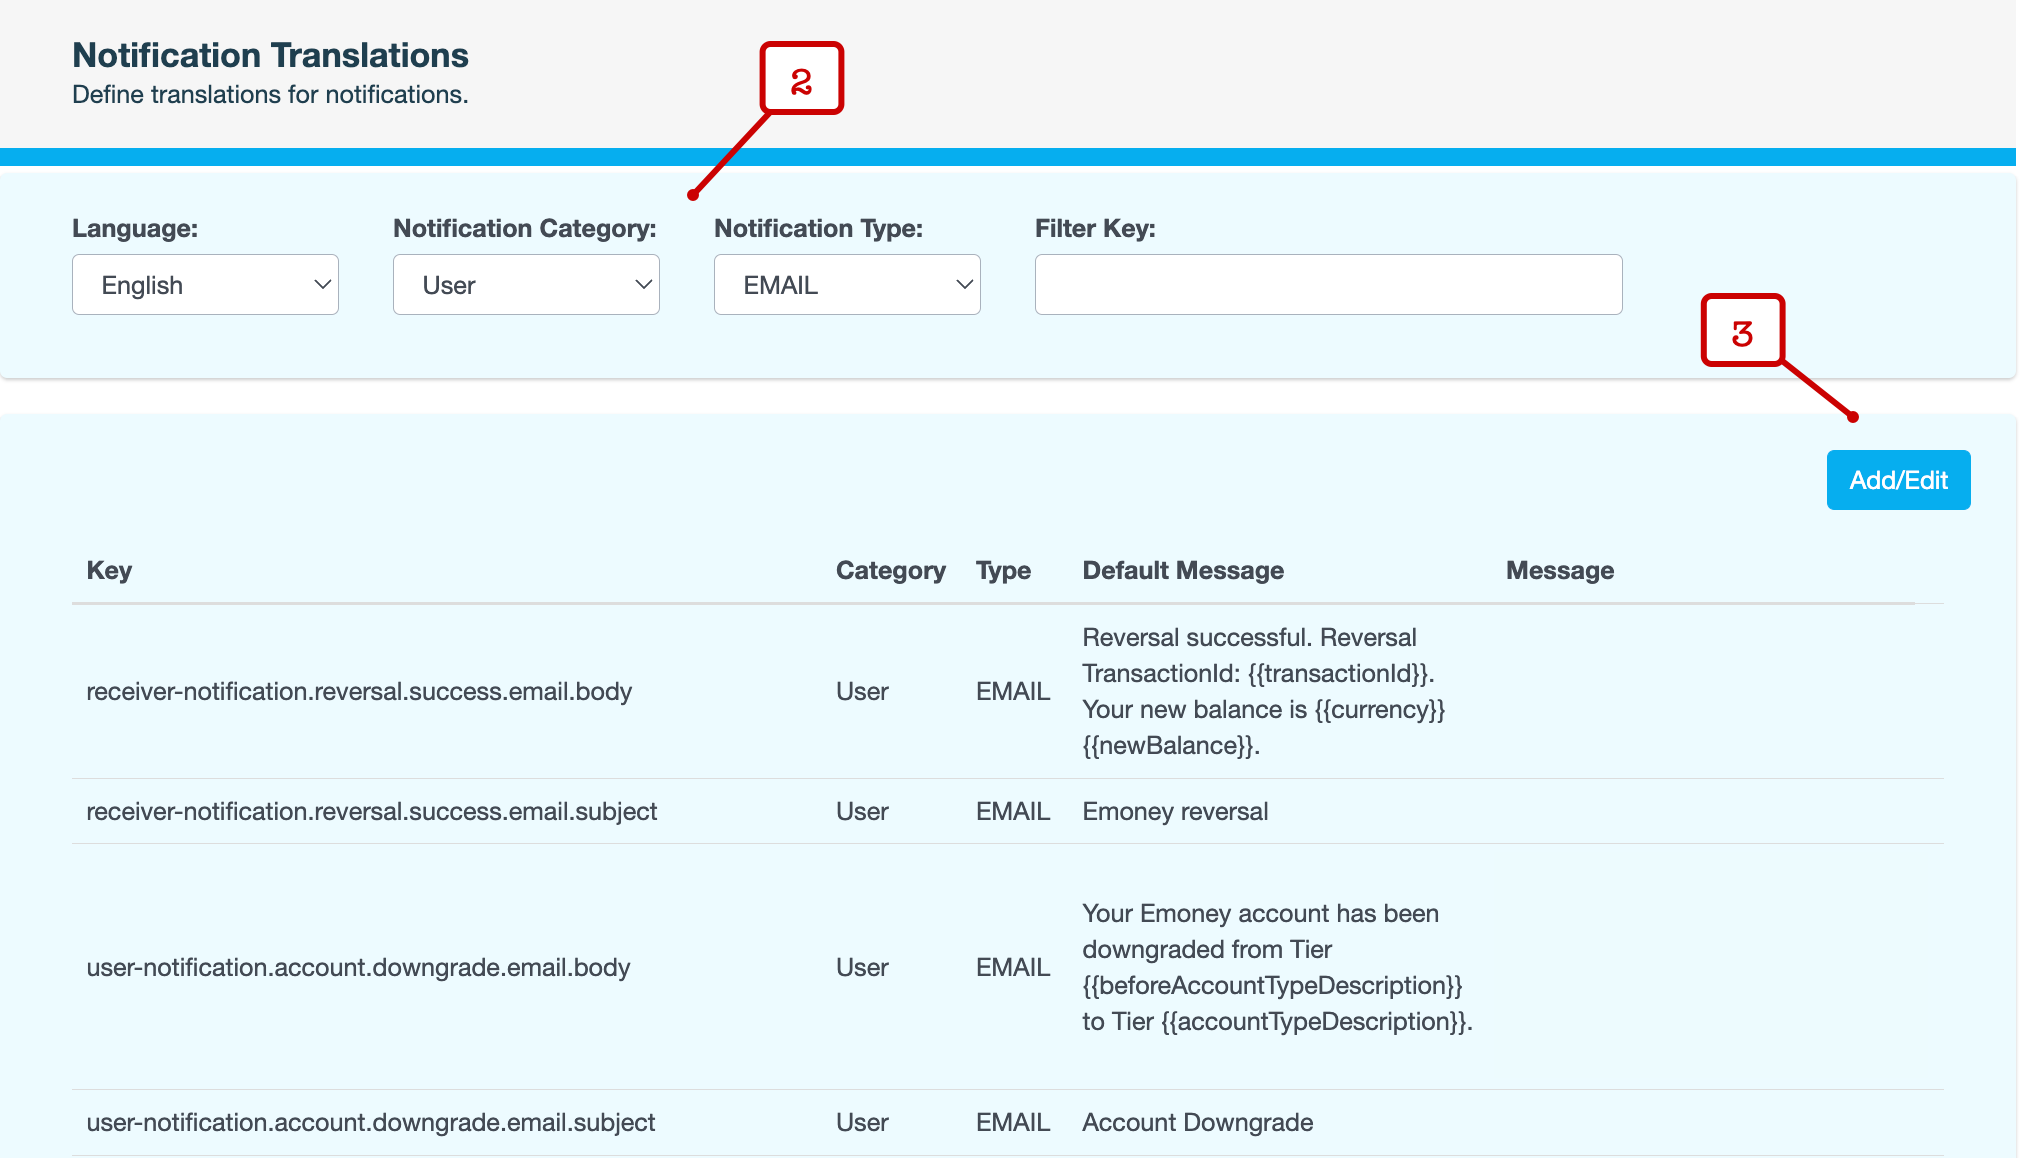
menu, click Languages and Translation > Translations > Notifications.
-
On the Notifications Translations page, use the fields at the top to narrow down the list of notifications that are displayed:
Field
Description
Language
English
Notification Category
Select one of the following:
-
User – Notifications for non-financial transactions, such as a PIN change or an account upgrade
-
Sender – Notifications for the senders of a transfer
-
Receiver – Notifications for the recipients of a transfer
-
Consumer – Notifications about external transfers
Notification Type
Method used to send the notification — SMS, Pushy or email.
Filter Key
Key that identifies the notification. For example,
user-notification.account.downgrade.email.body.Note that this field accepts partial values.
-
-
Click Add/Edit.
-
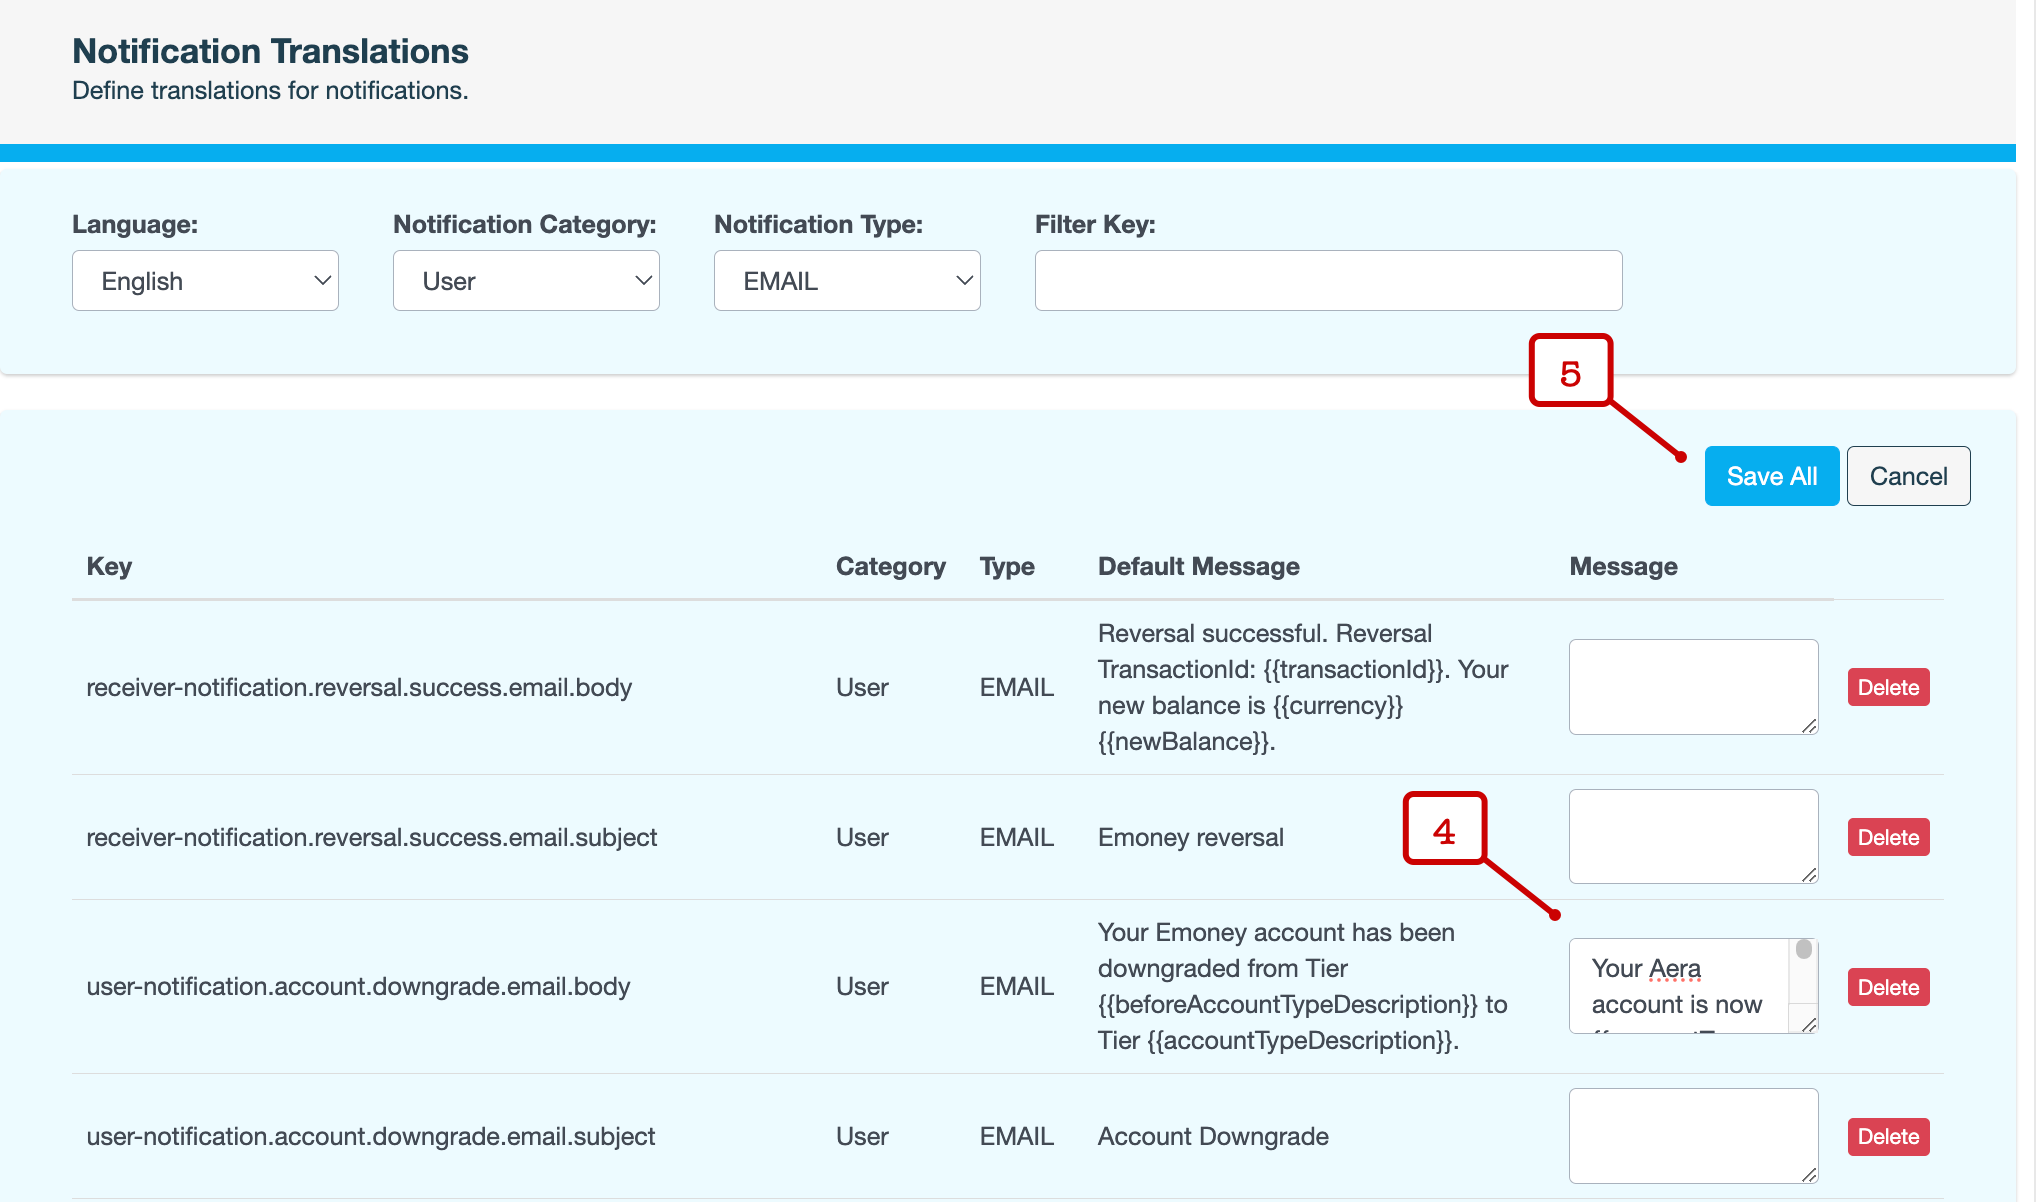
In the Message field, enter or update the content of the relevant notification.
If the Message field is empty, AMS uses the content in the Default Message field to send out the notification.
Only update the
titleandmessagefor Pushy notifications. We strongly recommend that these notifications are updated or created by someone with experience writing push notifications.{"event": "notification", "title": "{{eventType}}", "message": "A {{tagType}} Tag has been registered to your wallet account: {{customerId}}{{#tagAlias}} with an Alias: {{tagAlias}}{{/tagAlias}}"}
For email notifications, the subject and body of each email have separate Message fields. Ensure that you update both the fields.
-
Click Save All.
-
Enter a reason for updating the notification translations, then click CONFIRM.